This feature is available on the following TaskRay Product Editions:
- Starter
- Standard
- Premium
The Customer Onboarding Kickoff Flow is a template screen Flow that facilitates the creation of customer onboarding projects in TaskRay. The screen Flow is designed to run from an Opportunity and provide a user a set of screens to guide them through the process of kicking off a project. The Customer Onboarding Kickoff Flow is a Flow template, so administrators can save their own versions to customize how it works.
Choose How to Launch the Flow [Admin]
Lightning Action on Opportunity Page Layout (Lightning)
TaskRay comes with a packaged Lightning Action on the Opportunity that can be added to Opportunity page layouts. This allows users to click a button on Opportunities to launch the Customer Onboarding Kickoff Flow. This option is only available for Lightning Experience.
Follow these steps to add the Kick Off Onboarding Project Lightning Action to the Opportunity page layout:
- From Setup, navigate to Objects and Fields | Object Manager | Opportunity
- Click Page Layouts
- Select the page layout where you'd like to add the Kick Off Onboarding Project Lightning Action
- Find the Mobile & Lightning Actions section and drag the Kick Off Onboarding Project action onto the page layout
Screen Flow on Opportunity Record Page (Lightning)
The Customer Onboarding Kickoff Flow can be added directly to a Lightning record page to offer different options for how and when to launch the Flow. This option is only available for Lightning Experience.
Follow these steps to add the screen flow directly to the Opportunity record page:
- From Setup, navigate to Objects and Fields | Object Manager | Opportunity.
- Click Lightning Record Pages.
- Select the record page where you'd like to add the screen flow.
- Click Edit.
- In the Lightning Components list in the left column of the Lightning App Builder, find Flow and drag it onto the record page.
- In the right column of the Lightning App Builder, find the Flow dropdown and select TaskRay Customer Onboarding Kickoff Flow.
- For the recordId variable, enable the Pass record ID into this variable setting.
- Click Save.
Click here to learn more about Dynamic Lightning Pages and component visibility.
Custom Button or Link (Classic)
In Salesforce Classic, the Customer Onboarding Kickoff Flow can be launched from a custom detail page button or link. Follow these steps to create a custom detail page button or link:
- From Setup, navigate to Customize | Opportunities | Buttons, Links, and Actions.
- Click New Button or Link.
- For Label, enter Kick Off Onboarding Project.
- For Display Type, select Detail Page Button or Detail Page Link.
- For Behavior, choose one of the options to display in a window. The only unsupported option is Execute Javascript.
- For Content Source, select URL.
- For the button URL value, add the following text:
/flow/TASKRAY/TaskRay_Customer_Onboarding_Kickoff_Flow?recordId={!Opportunity.Id}
- Click Save.
Next, add the custom button or link to the Opportunity page layout:
- From Setup, navigate to Customize | Opportunities | Page Layouts.
- Select the page layout where you'd like to add the custom button or link.
- Find the Buttons or Custom Links section (depending on what you chose to create in the previous steps) and drag the detail page button or link to the relevant position on the page layout:
Using the Flow to Kick Off Projects
The Customer Onboarding Feedback Flow walks through a series of screens to guide you through the process of kicking off a project.
Deal Information
Primary Onboarding Contact
- A lookup to determine the primary customer contact for the onboarding project.
- This field populates the Primary Onboarding Contact lookup field on the TaskRay Project.
Desired Outcomes
- A text area that contains the customer's desired outcomes that were captured during the sales process.
- By default, this field will display any information previously entered by a user on the Opportunity in the Desired Outcomes field. If you add or modify the value of this field here, the new information will overwrite the original Desired Outcomes on the Opportunity and also populate a separate Desired Outcomes field on the TaskRay Project.
Deal Handoff Notes
- A text area that contains key information about a deal that can be referenced during a customer's onboarding project.
- By default, this field will display any information previously entered by a user in the Deal Handoff Notes field on the Opportunity. If you add or modify the value of this field here, the new information will overwrite the original Deal Handoff Notes on the Opportunity.
Choose How to Create a Project
Clone a Single Project Template
- Select this option if you would like to create a project based on a single project template.
Stitch a Project from Multiple Task Groups
- Select this option if you would like to create a project based on template task groups.
Create a Project
[Option 1] TaskRay Template Clone
If you chose to Clone a Single Project Template, the TaskRay Template Clone screen will display:
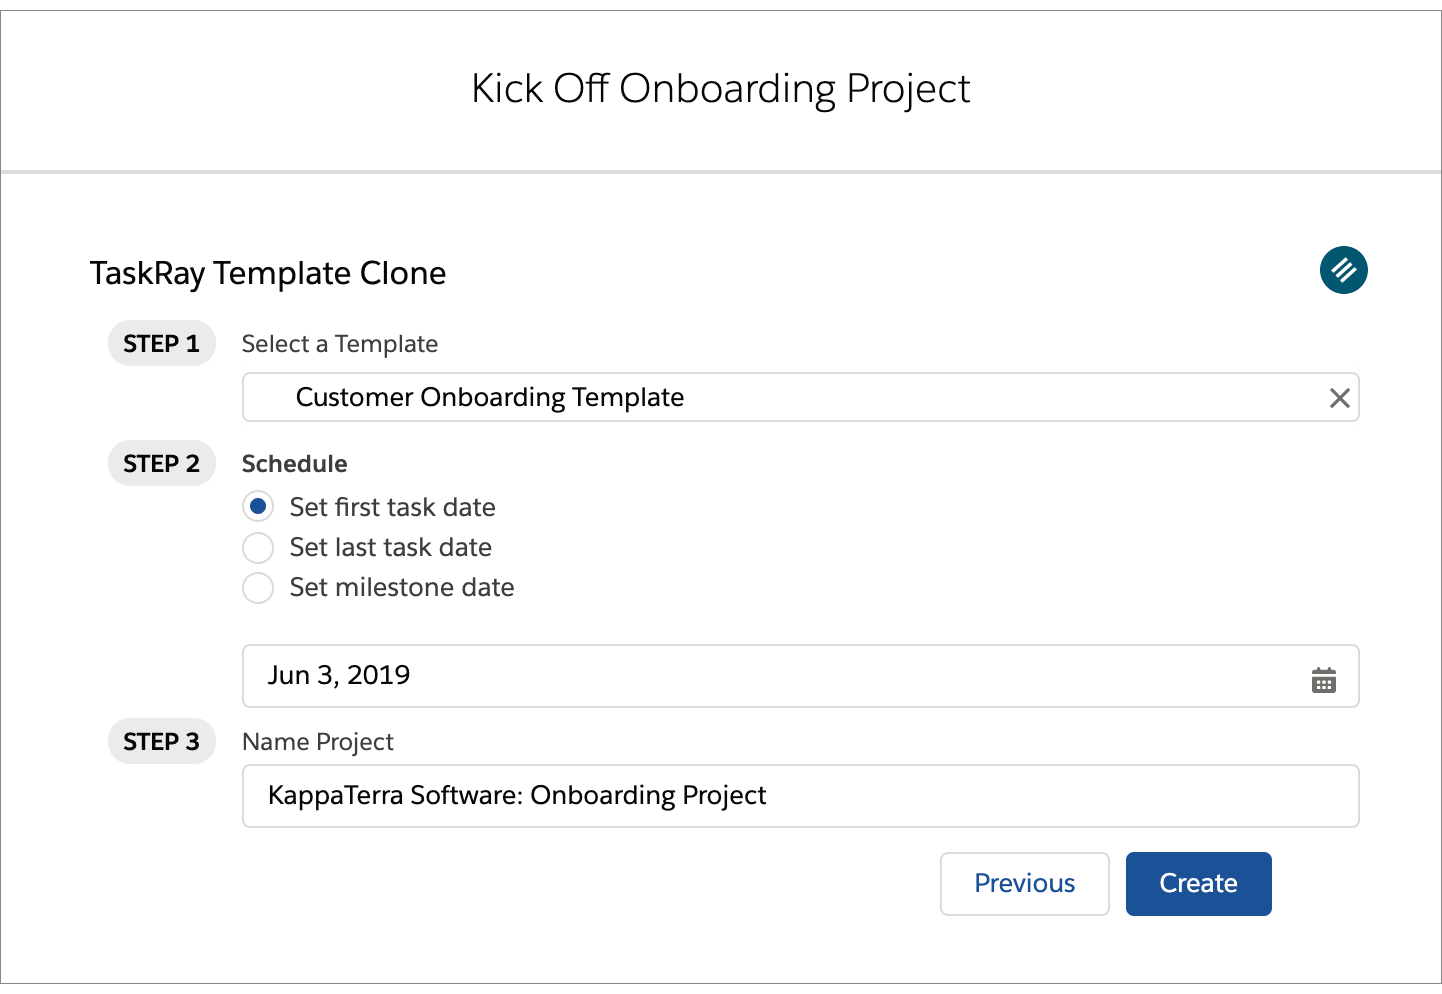 Select a Template
- Use the lookup field to select a template project. This field is filtered to only search for templates.
Schedule
- Choose a scheduling option for your new project. Projects can be scheduled based on First Task Date, Last Task Date, or by setting a Milestone Date.
- If you schedule based on First Task Date or Last Task Date, you will need to click into the Date field and select the date for the first or last task of the new project.
- If you schedule based on a Milestone Date, you will need to first click into the Select milestone field to pick a milestone (the menu will list all milestones from the original project) and then click into the Date field to schedule it for the new project.
Name Project
- Provide a name for the new project. This is limited to 80 characters.
Create
- When you're ready to create your new project, click Create to proceed to the next step.
[Option 2] Stitch a Project
If you chose to Stitch a Project from Multiple Task Groups, the Stitch a Project screen will display:
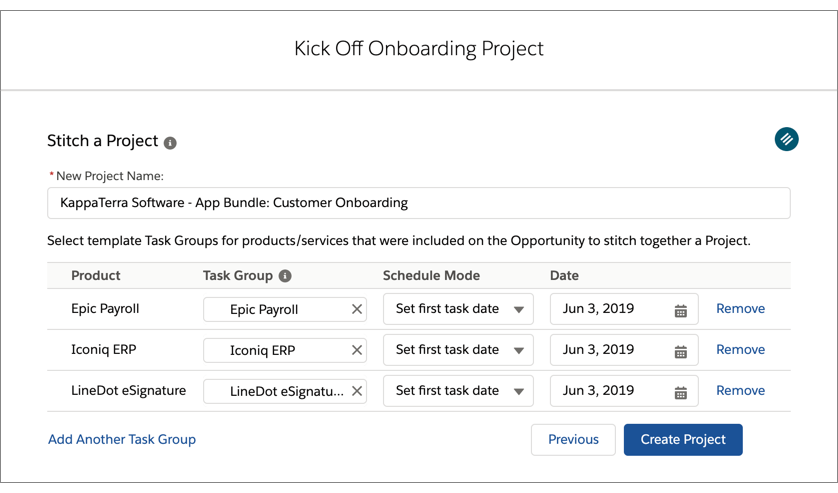 New Project Name
- Provide a name for the new project. This is limited to 80 characters.
Select Template Task Groups
- The Product column will display a row for each Opportunity Product that was included on the original Opportunity. This allows you to select template task groups that are specific to each product/service that was sold on the original Opportunity.
- The Task Group column allows you to select a template task group to stitch into the new project.
- The Schedule Mode column allows you to select a scheduling option for each task group. Task groups can be scheduled based on First Task Date, Last Task Date, or by setting a Milestone Date.
- The Date column allows you to select a date to schedule each task group.
- Use the Remove link to remove a row from the table.
Add Another Task Group
- Use the Add Another Task Group link to add another template task group.
Create Project
- When you're ready to stitch together your new project, click Create Project to proceed to the next step.
Assign Project Team
Change Project Owner
- Select a Project Owner. The default value is the owner of the template Project.
Send Project Team Notification Emails
- When enabled, this setting controls whether Team Members added to the project will receive the default Project Team Notification email.
- NOTE: Toggle this setting before adding Users to the Project Team to control whether they are sent an email indicating they've been assigned to the project.
Users
- Add Users to the Project Team. Users from the template Project Team are included here by default.
- Tasks and Checklists can be reassigned in bulk from a given User to another User or Queue on the Project Team.
- If a User has no assigned tasks or Checklists, they can be removed from the Project Team.
Queues
- Add Queues to the Project Team. Queues from the template Project Team are included here by default.
- Tasks and Checklists can be reassigned in bulk from a given Queue to another User or Queue on the Project Team.
- If a Queue has no assigned tasks or checklists, it can be removed from the Project Team.
- To learn more about Queues, please see this article.
Finish Project Kickoff
The final screen in the Customer Onboarding Kickoff Flow displays an overview of the new project and offers an option to Set a Baseline for the New Project.
Set a Baseline for the New Project
- When enabled, this will create a Baseline for the new project.
- When a baseline is set on a project, TaskRay will take a snapshot of the project, its task groups, and its tasks.
- For more information about Baselines, please see this article.
Click Next to finish the Flow and view the project in TaskRay.